Ultimate Guide to Outdoor Backpacks for Beginners: Choosing the Right Gear for a 10x Easier Hike!
Why do some people hike with ease while you feel exhausted and sore after just 30 minutes? 90% of beginners struggle because they chose the wrong backpack. Bigger isn’t always better, and expensive doesn’t always mean “right.” Choosing the wrong pack makes even the most beautiful scenery feel like a burden. This comprehensive guide covers classification, scenarios, selection, and usage to ensure you get it right the first time.
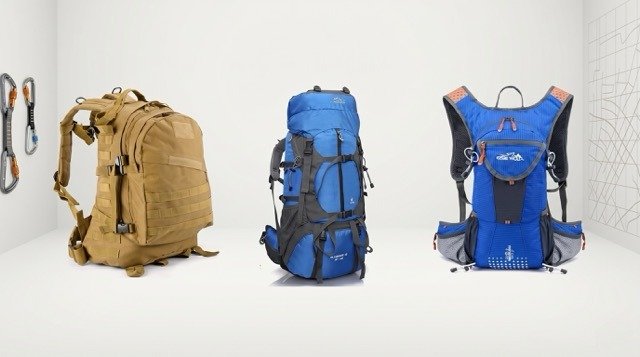
I.Outdoor Backpack Classifications: A Quick Guide
Outdoor backpacks are categorized by function, capacity, and scenario into four main types:
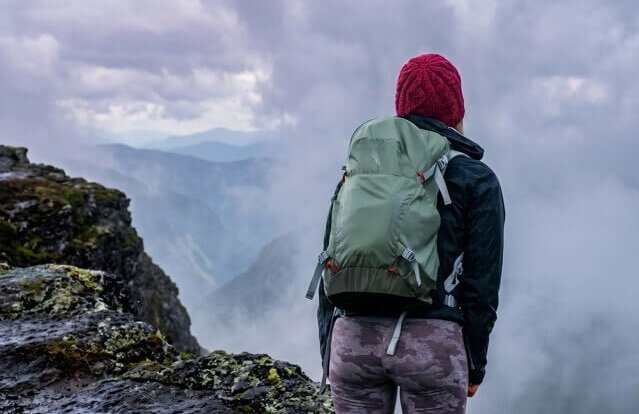
1.Daypacks (15-30L) — The Beginner’s First Choice
Core Use: Single-day hikes, city outskirts, weekend outings (no camping).
Features: Lightweight (0.5-0.8kg), highly breathable, no complex frames.
Target Audience: Beginners, women, daily commuters.
Features: Lightweight (0.5-0.8kg), highly breathable, no complex frames.
Target Audience: Beginners, women, daily commuters.
2.Short-Term Camping Packs (30-50L) — The Versatile Workhorse
Core Use: 2-3 day light camping, short treks, road trips.
Features: Basic suspension support, clear compartments, external attachment points for tents/sleeping bags.
Target Audience: Weekend campers, intermediate hikers.
Features: Basic suspension support, clear compartments, external attachment points for tents/sleeping bags.
Target Audience: Weekend campers, intermediate hikers.
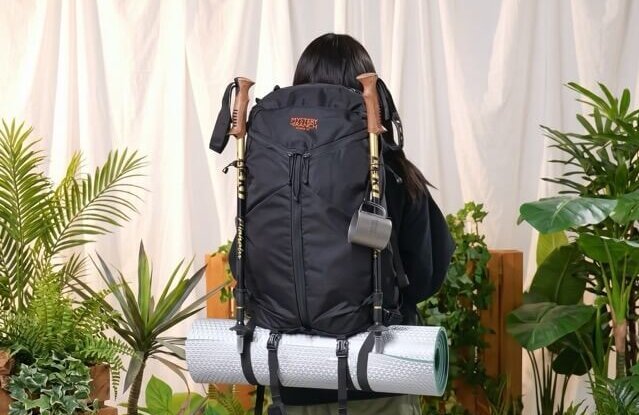
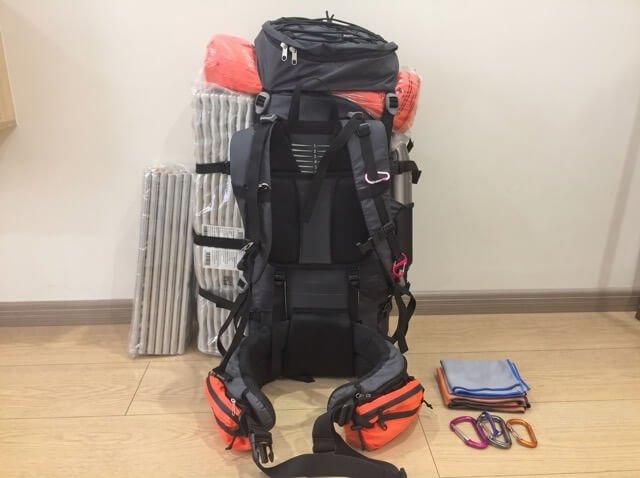
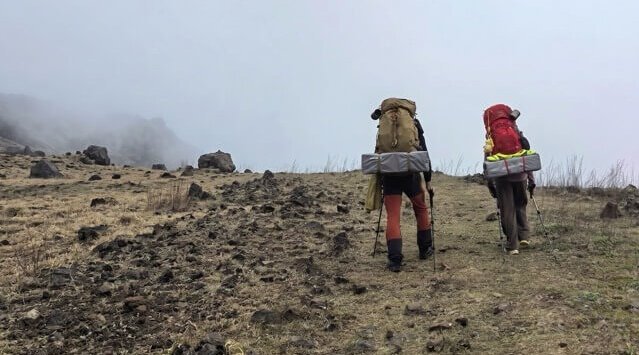
3. Multi-Day Heavy-Duty Packs (50-80L) — The Pro’s Choice
Core Use: 5-7 day treks, high-altitude climbing, winter camping.
Features: Rigid internal frames (aluminum/plastic), high load capacity, extensive attachment systems.
Target Audience: Experienced hikers, long-distance trekkers.
Features: Rigid internal frames (aluminum/plastic), high load capacity, extensive attachment systems.
Target Audience: Experienced hikers, long-distance trekkers.
4.Technical Packs — Specialized Scenarios
Summit Packs (10-20L): Small and flexible for the final push to a peak.
Climbing Packs: Rugged, streamlined, and equipped with ice axe loops.
Running Packs (5-15L): Ultra-light, vest-style fit, and hydration compatible.
Climbing Packs: Rugged, streamlined, and equipped with ice axe loops.
Running Packs (5-15L): Ultra-light, vest-style fit, and hydration compatible.
II. Scenario Matching: The Right Capacity for the Job
| Scenario | Recommended Capacity | Key Items to Pack | Selection Priority |
| City Leisure / Day Hike | 15-25L | Water (1L), snacks, sun protection, power bank, first aid. | Breathable back panel, quick-access side pockets. |
| 2-3 Day Light Camping | 35-45L | Tent, sleeping bag, mat, stove, 2 days of food/water. | Thick hip belt, adjustable suspension, sleeping bag compartment. |
| 5-7 Day Trekking | 55-70L+ | Full camping gear, heavy insulation, multi-day supplies. | Rigid support, 80% weight transfer to hips, high durability. |
III. 5 Core Selection Factors for Beginners
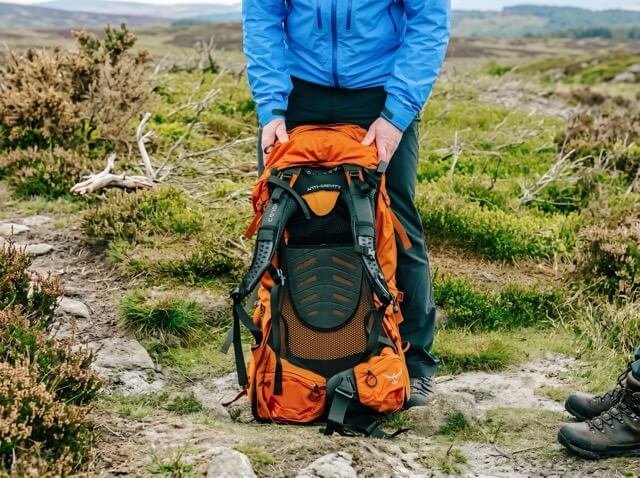
1.Suspension System (The Soul of the Pack): A good system transfers 80% of the weight to your hips, not your shoulders.
Tip: Measure your Torso Length (C7 vertebrae to the top of the iliac crest), not your total height.
Tip: Measure your Torso Length (C7 vertebrae to the top of the iliac crest), not your total height.
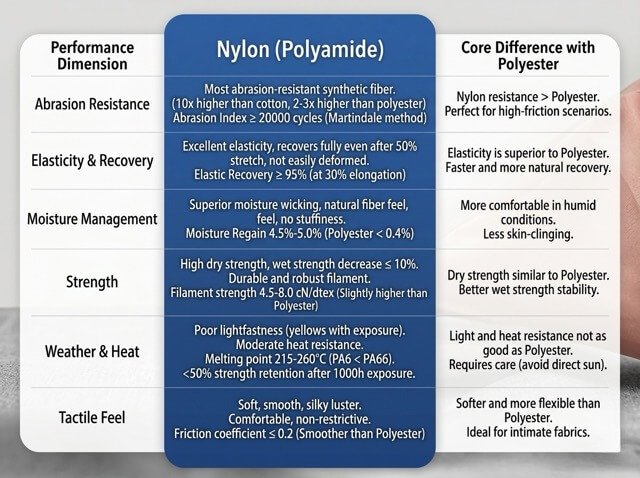
2.Fabric Materials: Nylon (specifically Cordura) is the gold standard for weight and durability. Look for a Denier (D) rating between 210D and 600D depending on the load.
3.Capacity Rules: Never buy a pack that is too big. An empty large pack shifts the center of gravity backward, causing instability.
4.The Details: Look for S-shaped shoulder straps, YKK zippers, and a dedicated hydration sleeve.
5.Gender Specifics: Women’s packs usually feature narrower shoulder strap spacing and shorter torso lengths.

IV. Professional Packing & Adjustment Tips
The Adjustment Order
1.Hip Belt First: Align with the hip bone and tighten. This is your main support.
2.Shoulder Straps: Pull back and up. There should be a 1-finger gap at the top of the shoulder.
3.Chest Strap: 3-5cm below the collarbone to prevent sliding.
4.Load Lifters: Tighten the top straps to pull the pack closer to your back.
2.Shoulder Straps: Pull back and up. There should be a 1-finger gap at the top of the shoulder.
3.Chest Strap: 3-5cm below the collarbone to prevent sliding.
4.Load Lifters: Tighten the top straps to pull the pack closer to your back.
The Golden Rule of Loading
1.Heavy Items (Stove, Camera): Place near the shoulder blades, close to the back.
2.Light Items (Clothes): Place at the bottom or outer layers.
3.Balance: Ensure left and right sides are weighted equally.
2.Light Items (Clothes): Place at the bottom or outer layers.
3.Balance: Ensure left and right sides are weighted equally.
